Admin Dashboard
The Dashboard
After login, you will see the Admin dashboard.

Website setting.
Here set your website details, social links and Most probably API(facebook and google for social login) setup. The API used for social login, after you setup the api you will see the Social login Button in Login and Register page.
if you set it blank the Social button is not showing in those pages.
Site Settings

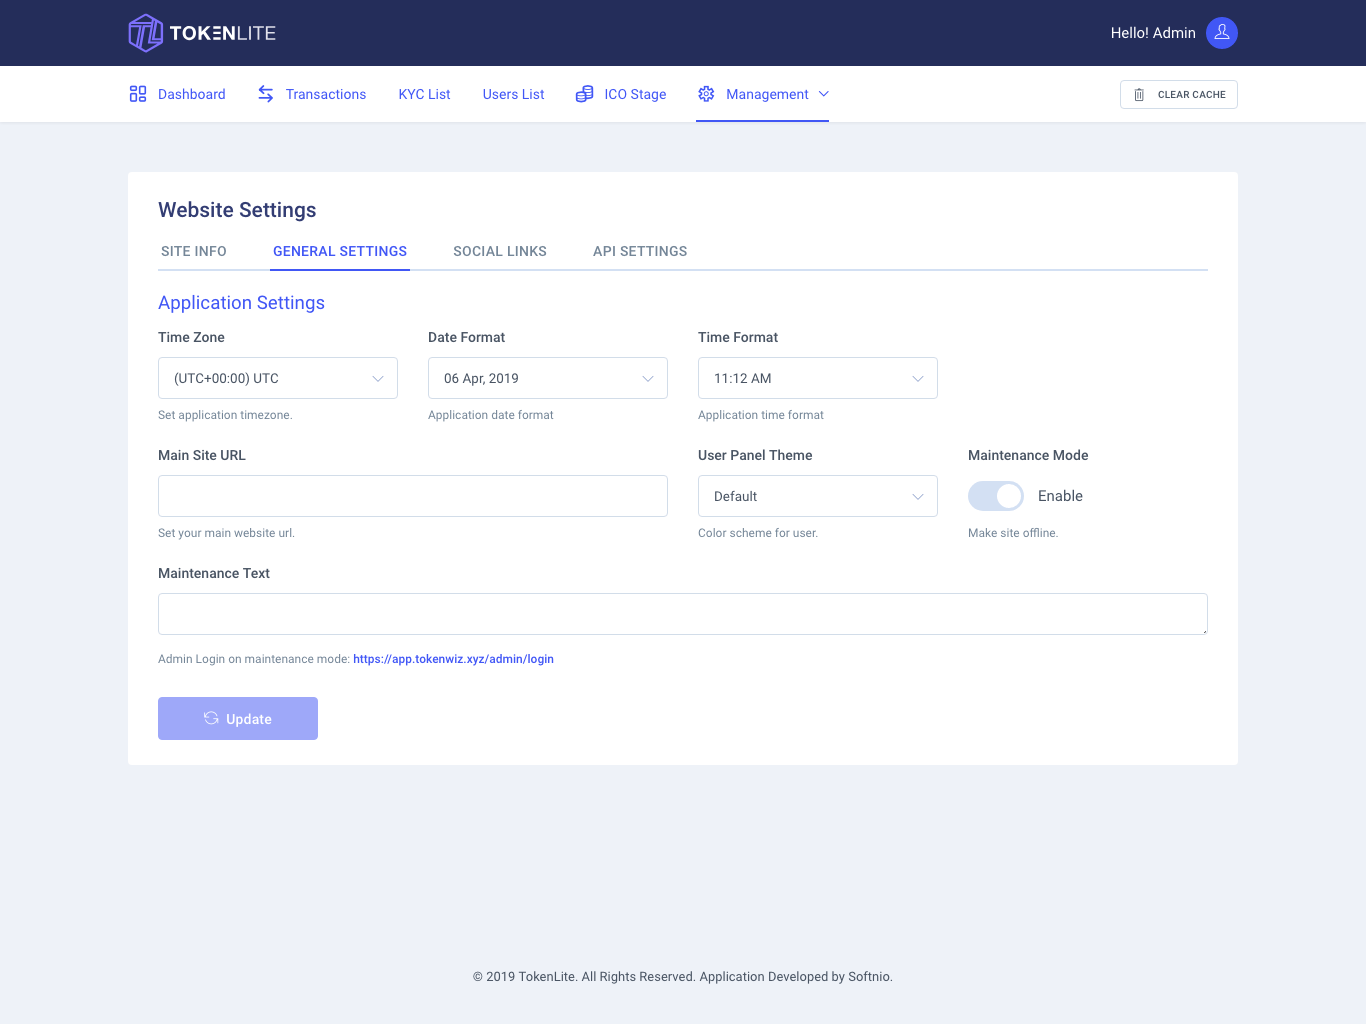
General Settings
Set your Timezone, Date/Time format, Homepage URL. In this section you can enable maintenance mode while your site is upgrading.
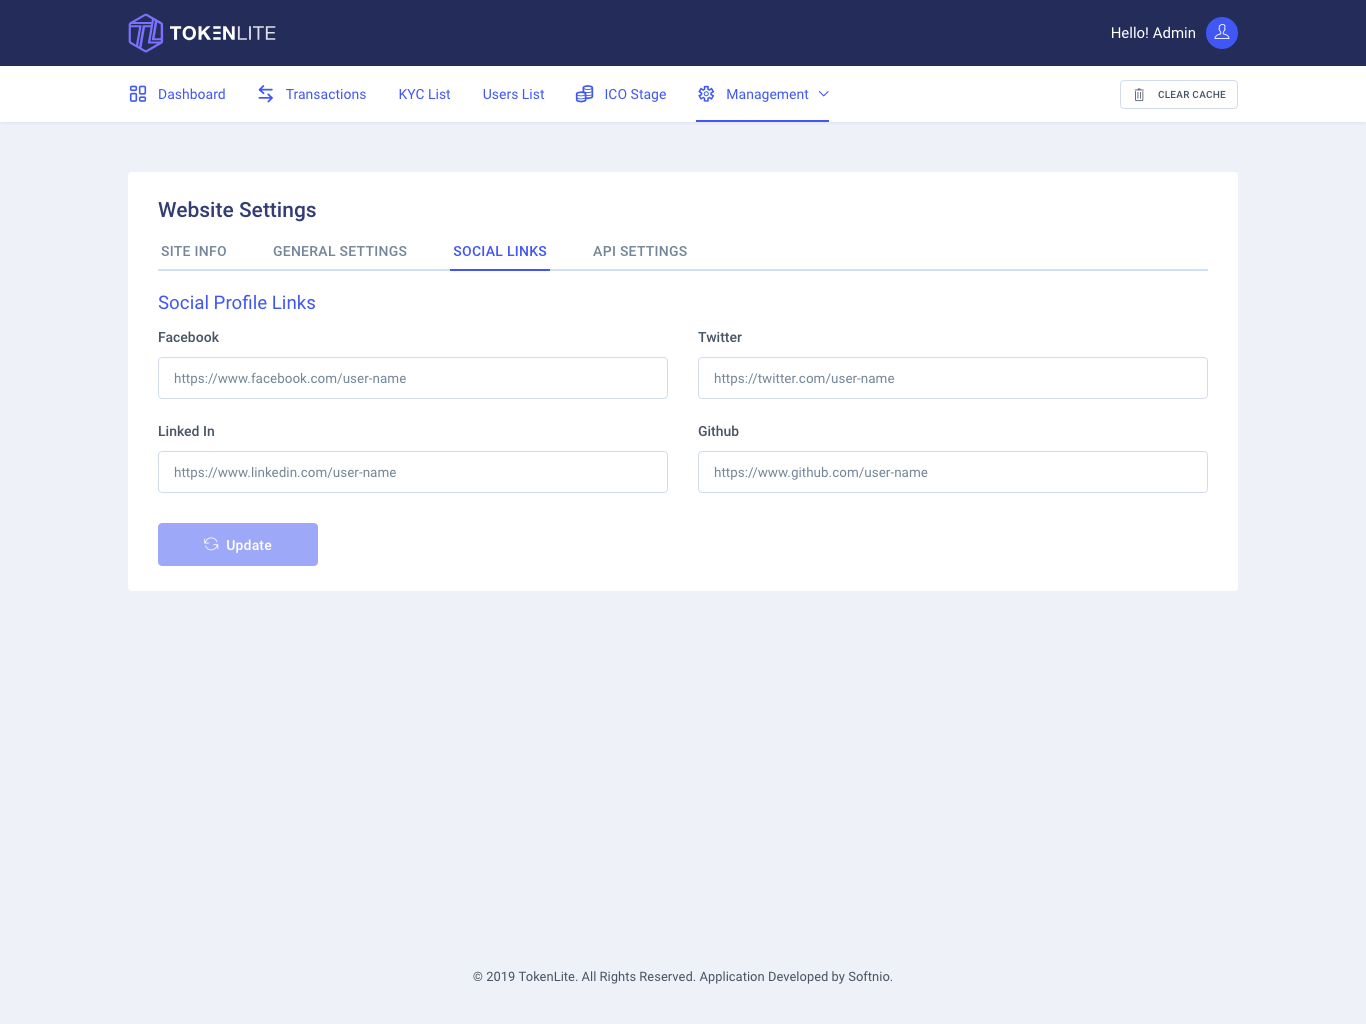
Site Social Links
This social link will appare in your site footer.
Site API Credentials
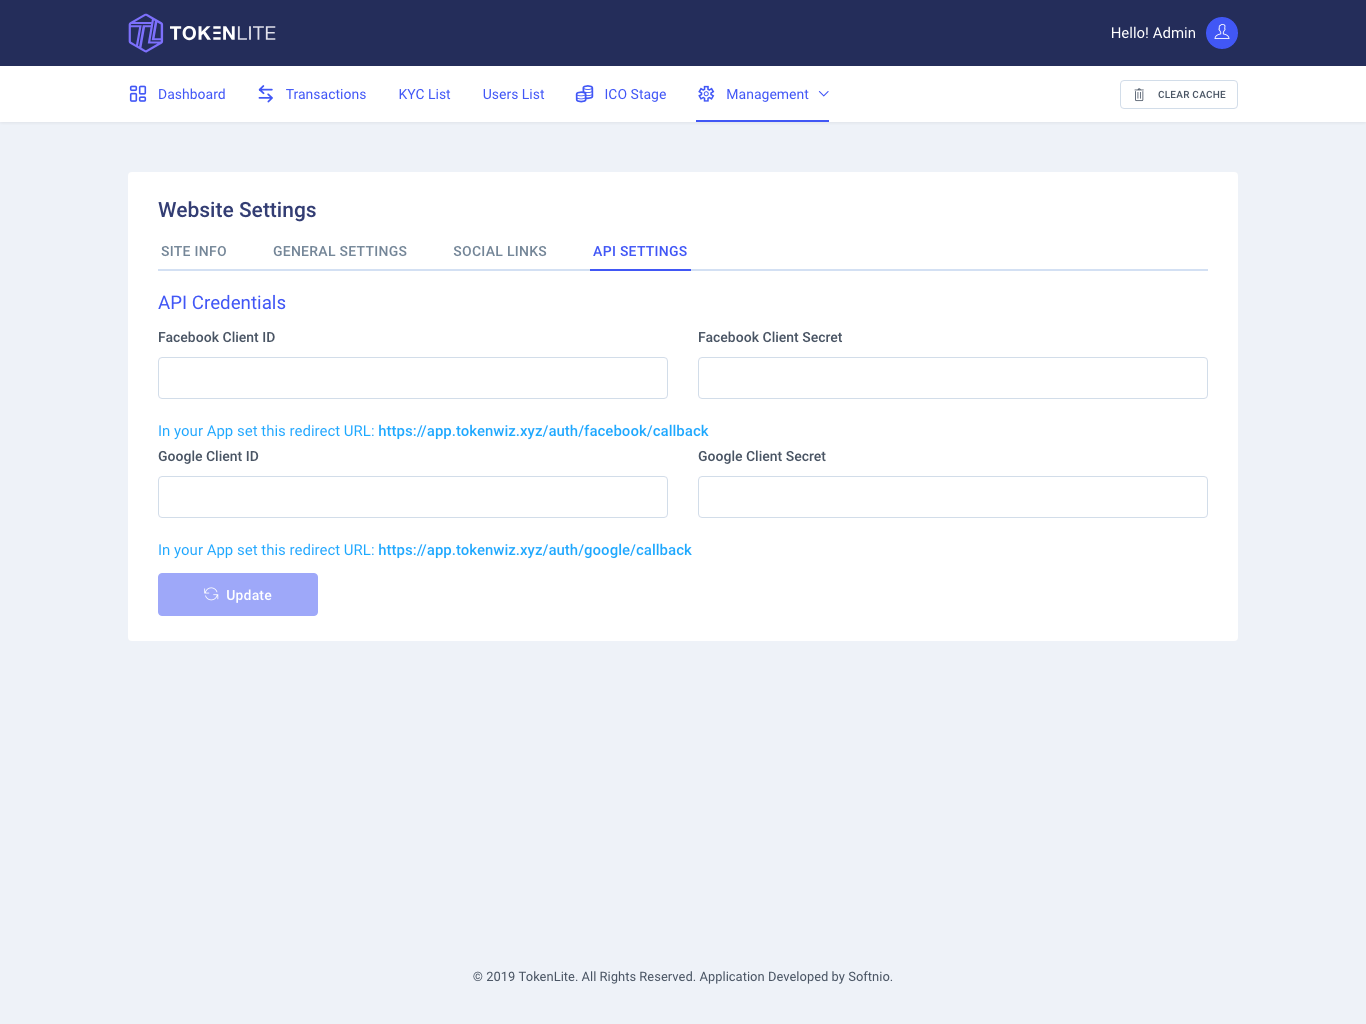
Get Facebook API from here by creating an App and use Facebook Login product.
Get Google API from here use Google+ for API
Email Setup
Set Email Credentials & Info
From the top of the menu click Manage and go to mailing settings.
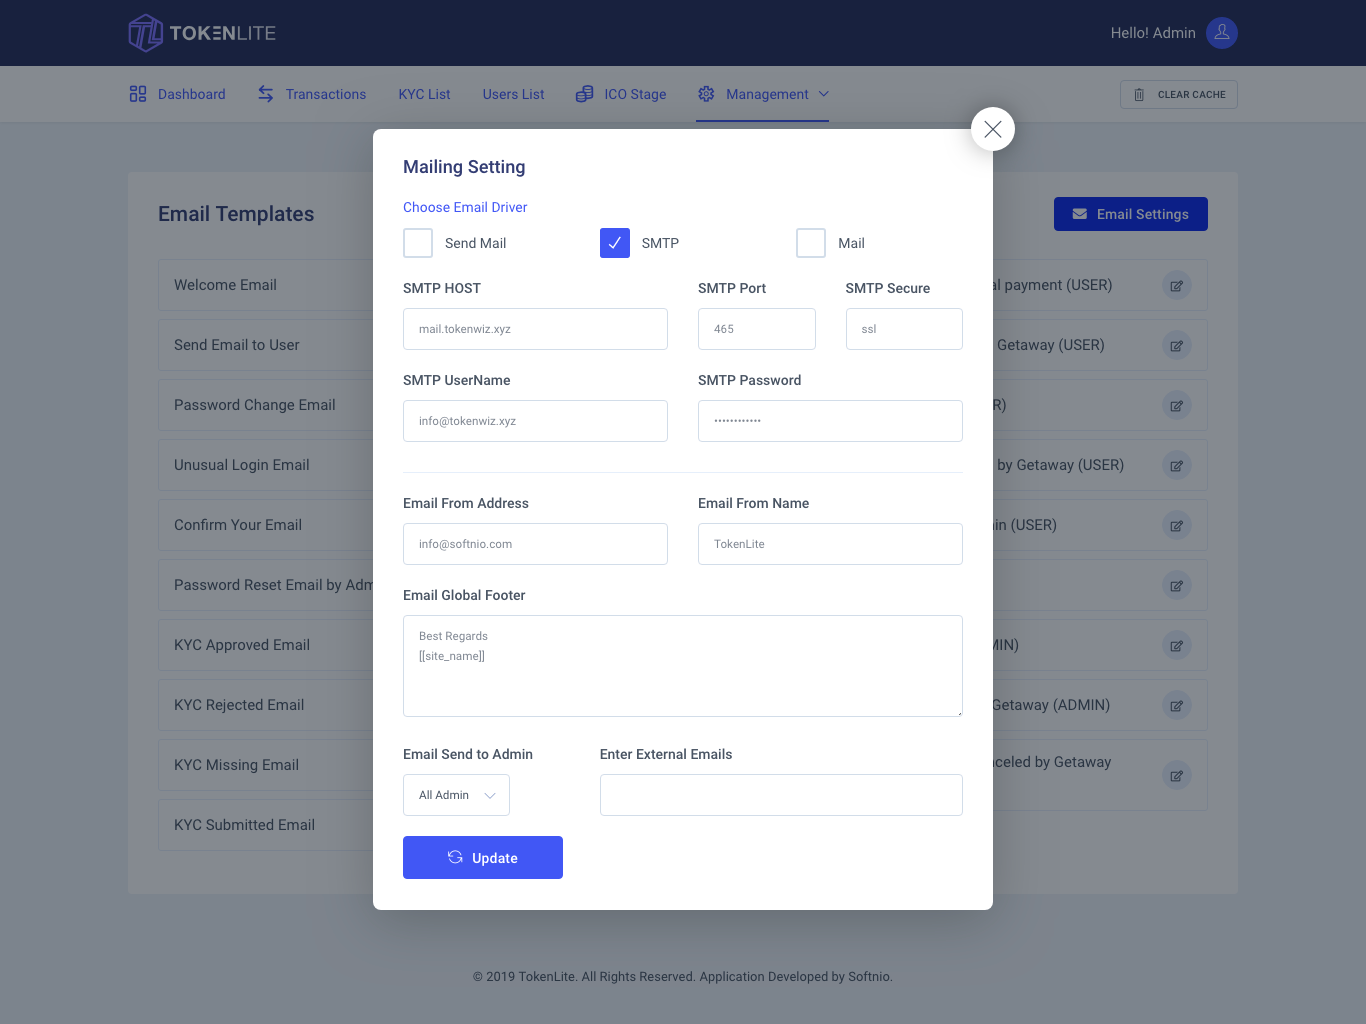
in the form set your email host, port, username, password, encryption type, and email info From Address and From name (It's will show as email from).
Edit Email template
In the email setting page you see here is some email templates we are included for the application, you can change the email template static text etc.
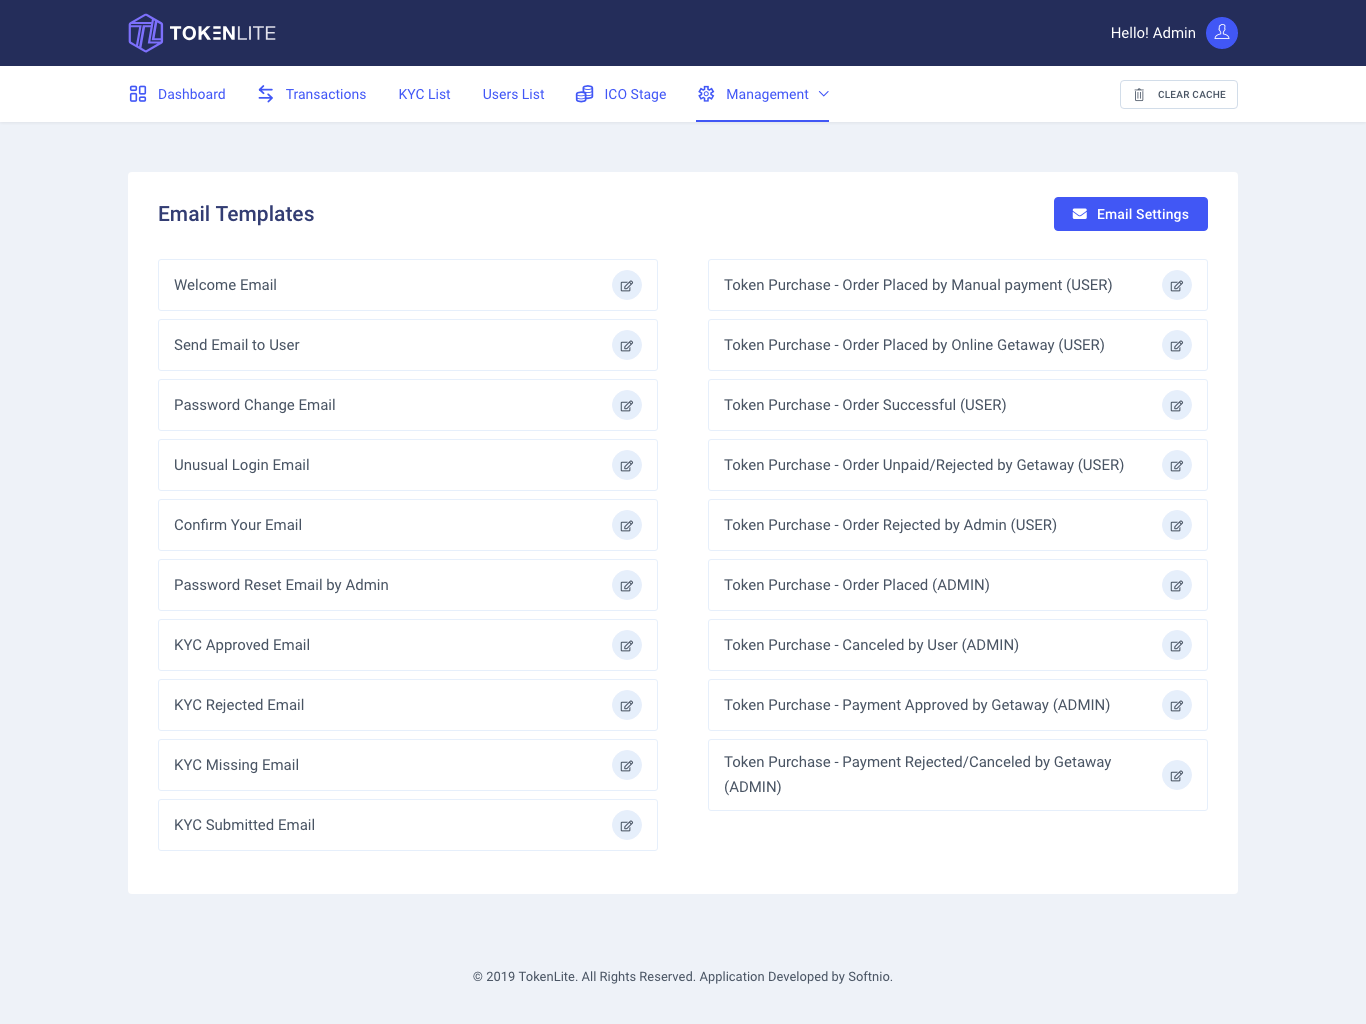
-click the edit icon button in the right side of item.
-Edit Email template modal will be open.
NB: Remember! [[___]] is short-code do not change or remove this, unless the email template is not working properly.
In this template we are used the Laravel markdown format so if you use markdown syntax sometime it's break the design.
Template greeting is a hello/hi text beginning the email and regards is in footer.
Payment Setup
Currently you can setup only manual payments, Manual(ETH, BTC, LTC) and Bank payment for USD.
Manual Payment Gateway
From the top menu click Manage then payment setup... You will see the below page ...

Here you have to active at least one payment method to active your token sale. If you want to active manual payment gateway then enable the Active or Deactive switch. After enable the manual option then active your payment method, like Ethereum, Litecoin, Bitcoin.
NB: Remember! Manual payment only for Crypt currencies.
Ok, here set your Wallet address for payment. From the bottom of this page you can add your bank credential for active bank payment for USD currency.
Manage currency Rate
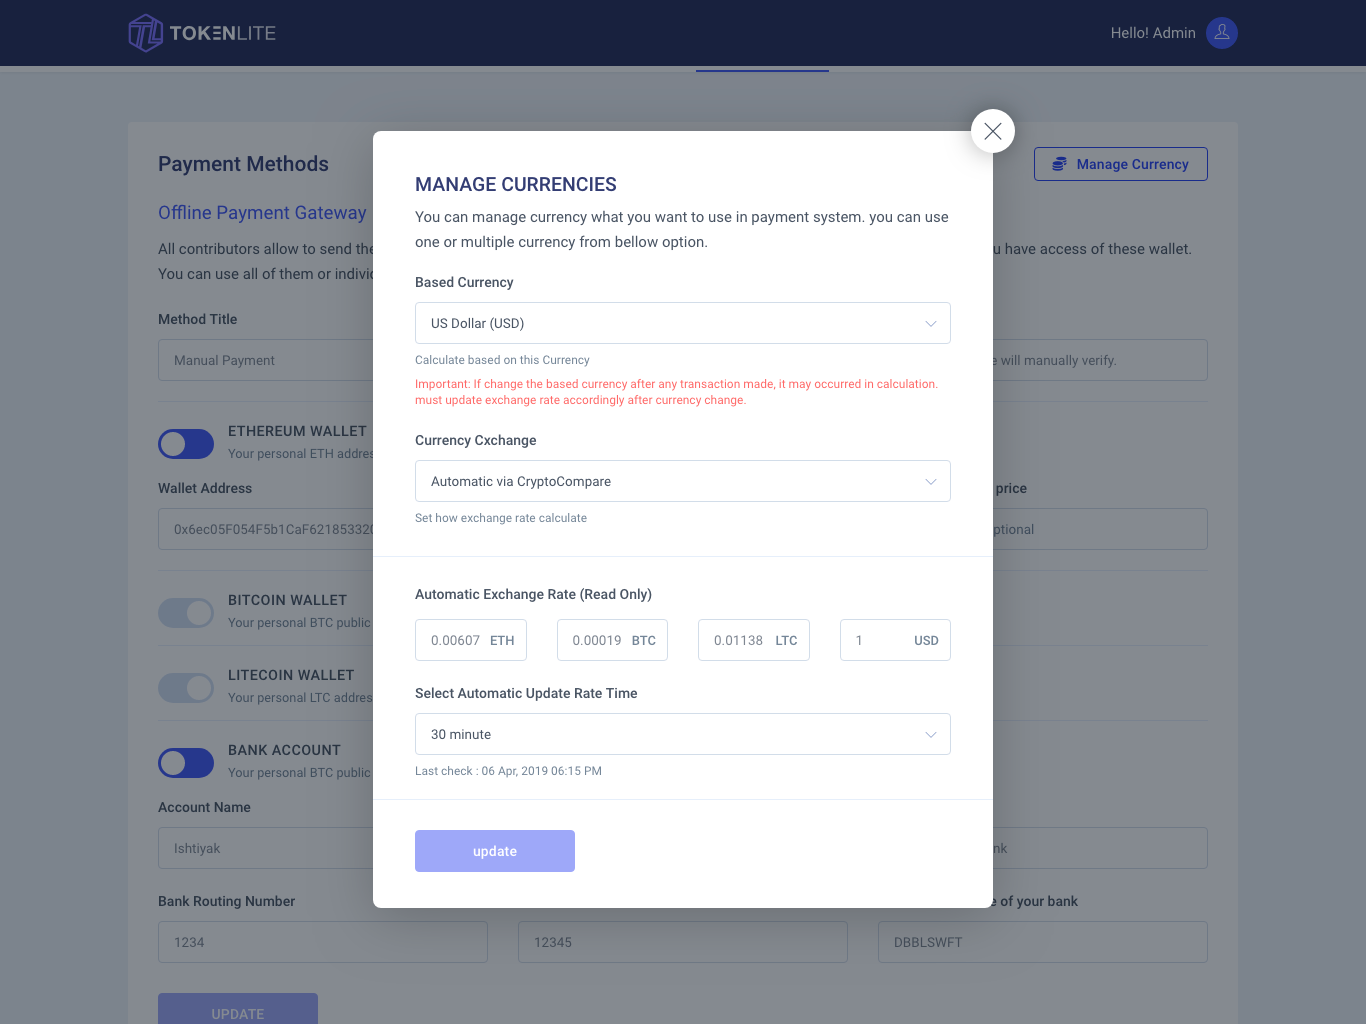
From the payment setting page click Manage button. You will see a popup like below image. Here you can set the currency rate manually or Automatically. If you select Automatic then the currency will update from "cryptocompare" after the given interval.
Pages Setting
Customize the pages
Click the Manage button from top of the menu and go to page setting. Some of our built in page you can just edit, like privacy and policy, Terms and policy etc. Also you can able to upload white paper from here.

If you want to edit any page then click the edit button beside the page item.
You will view/edit the page by clicking edit icon button,
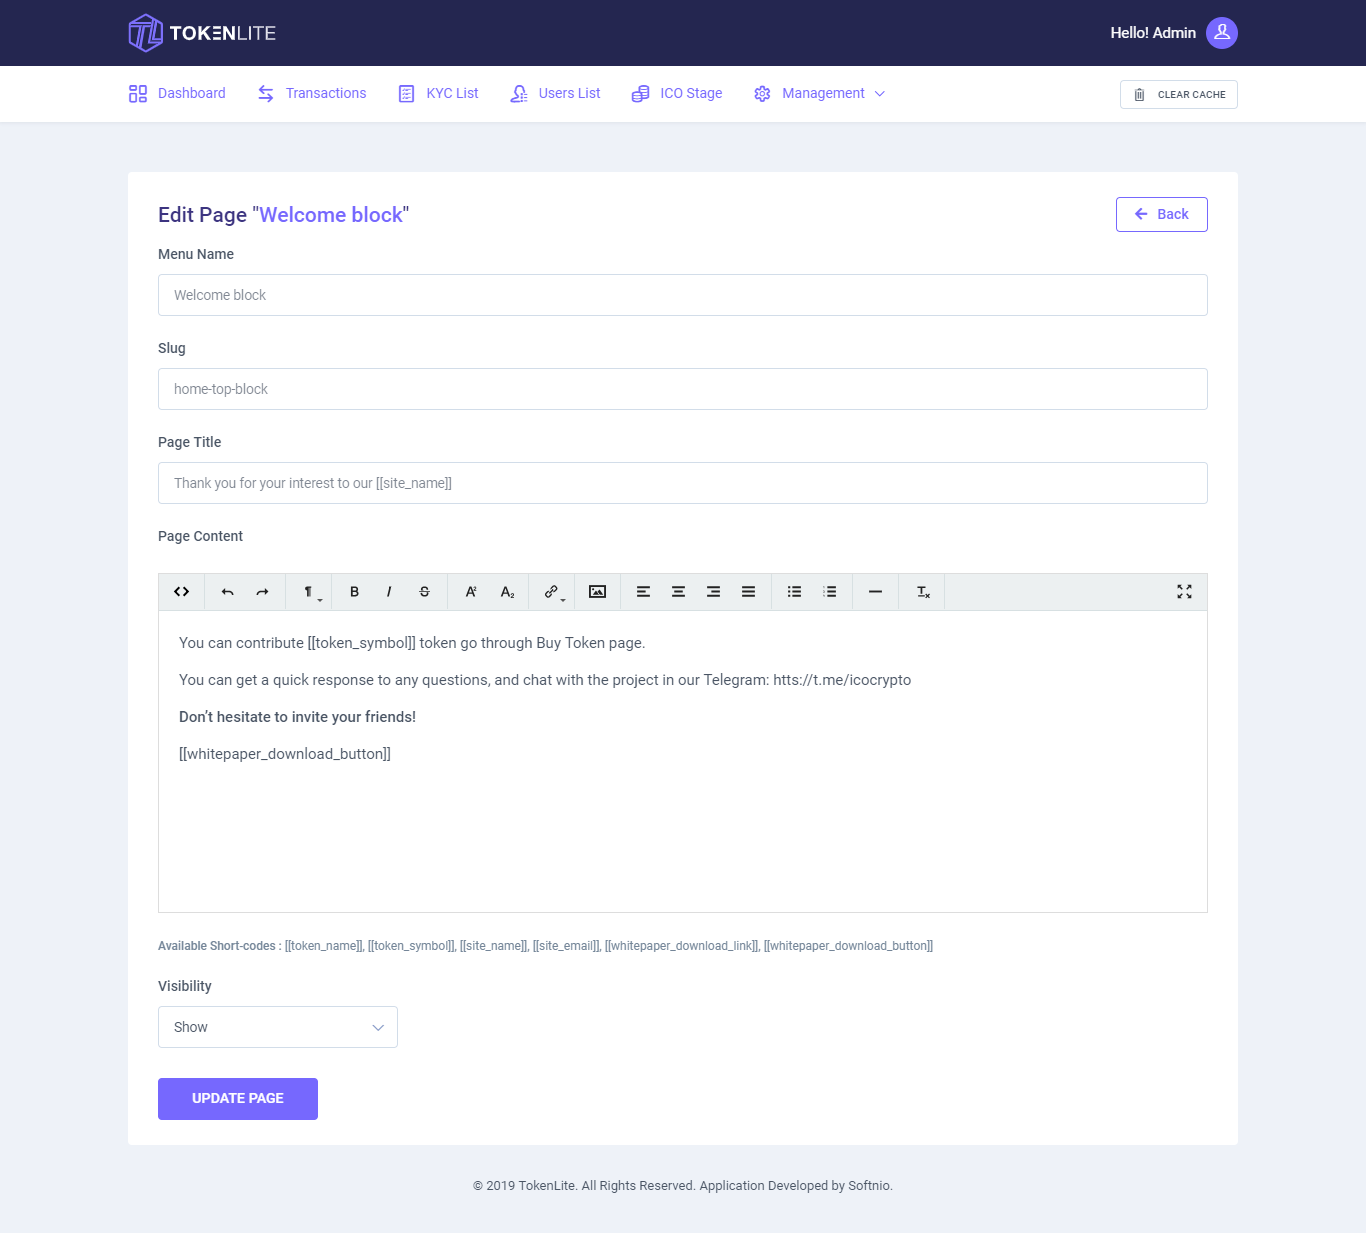
Here you can set the page title and page content. You can add custom slug which will show in browser url.
ICO Setting
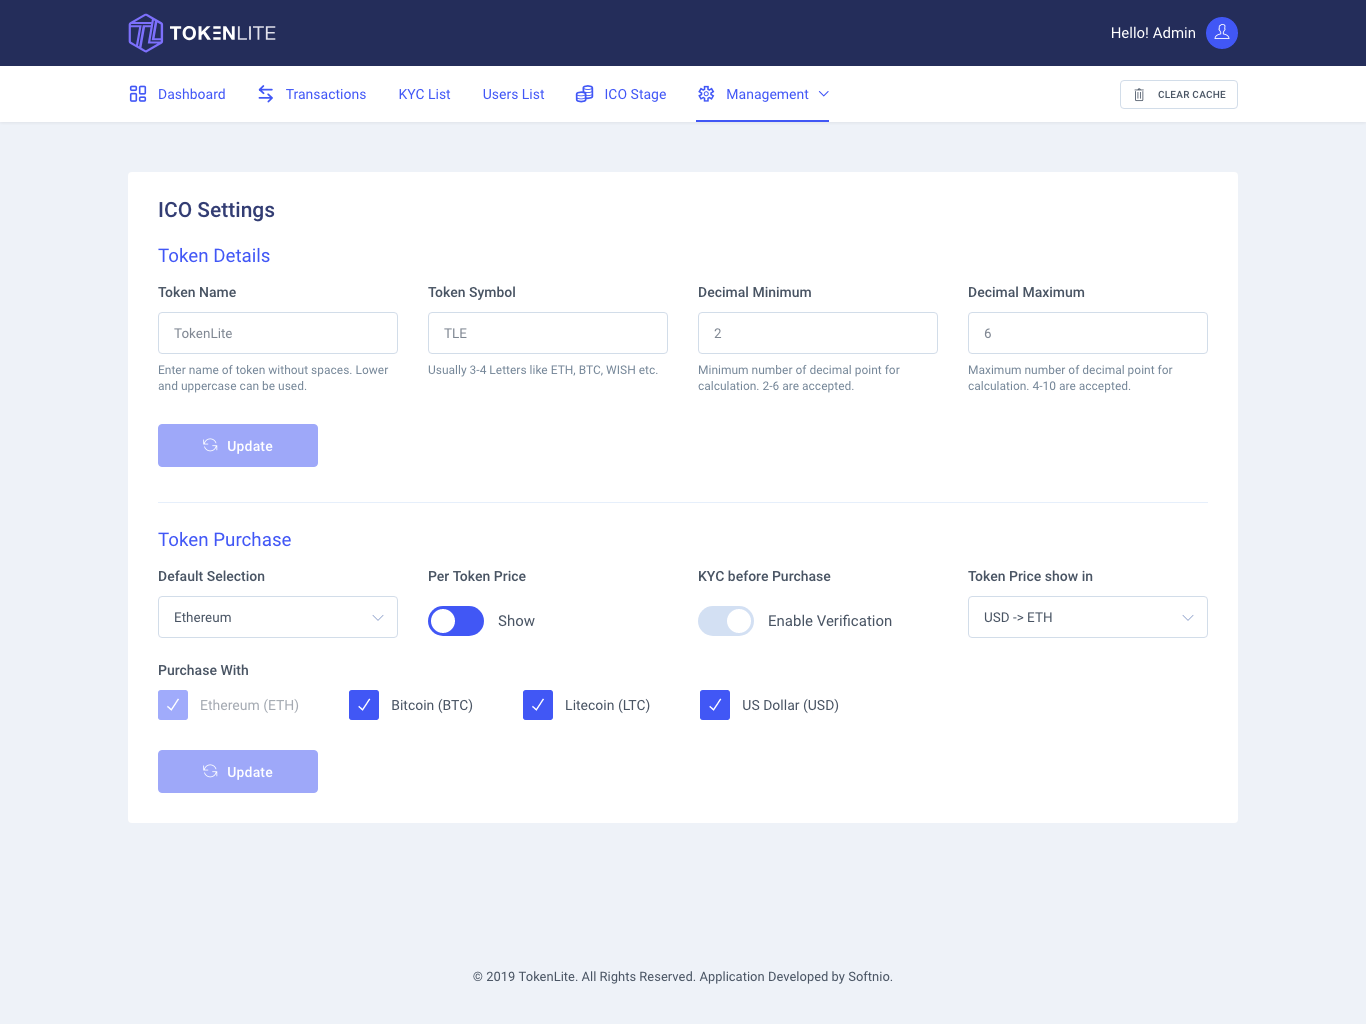
From the navigation menu select Manage the click ICO setting. Then you will see the stage Setting details.
Stage Setup
In the navigation menu.
Click to ICO Stages
All Stages
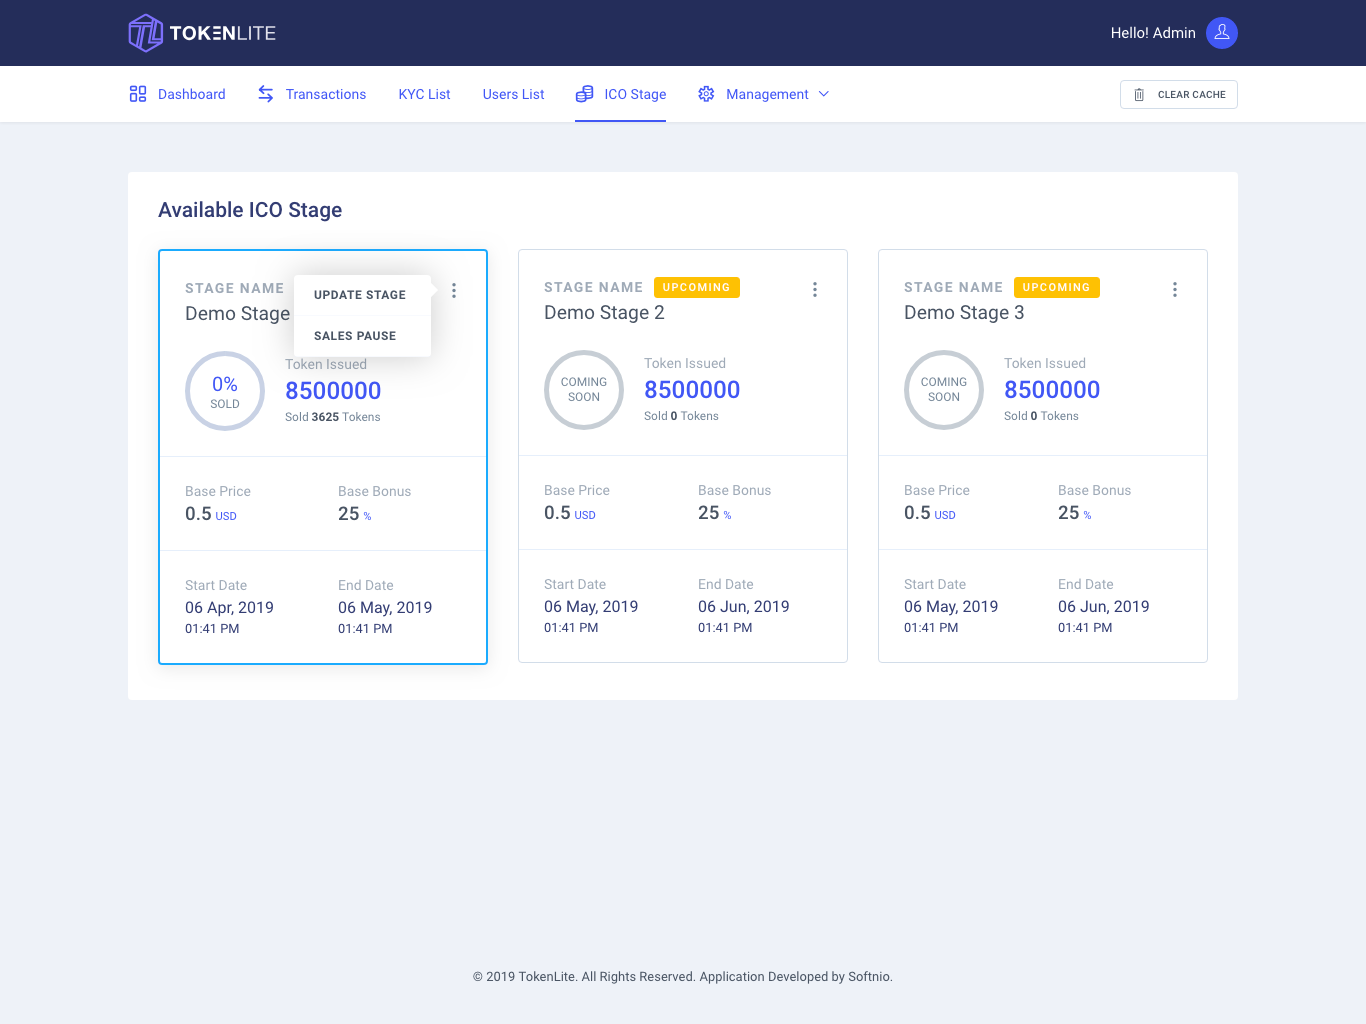
Stage Details
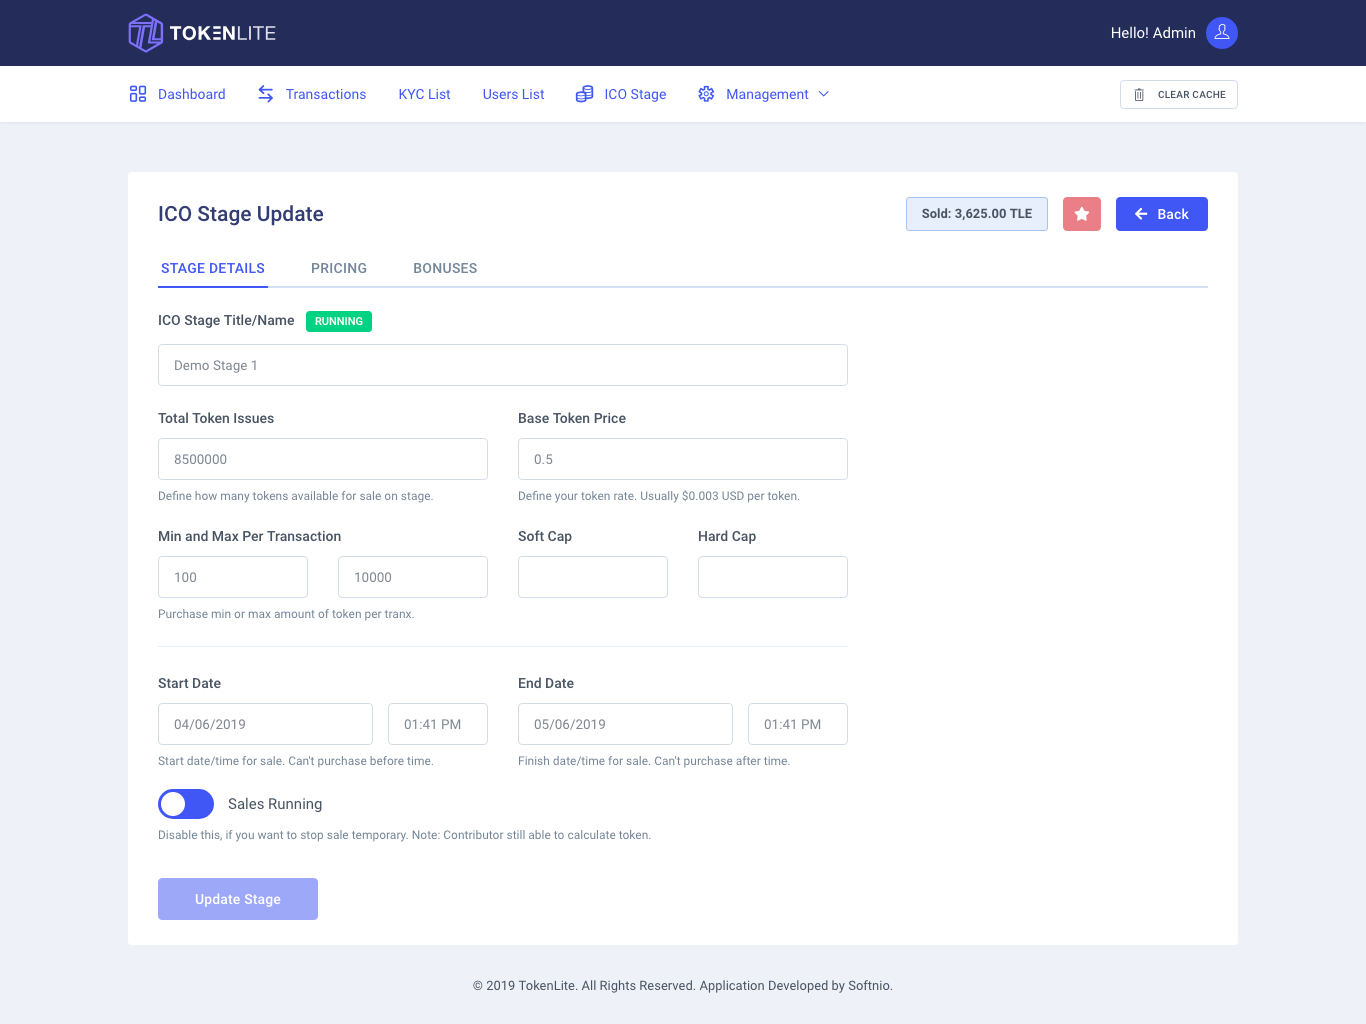
Edit Stage
To edit any stage select the stage from drop-down.
Then you will see the stage details, stage price & stage bonus option in the stage page.
to edit the stage details then make change in the stage details form.
then click to Update Stage.
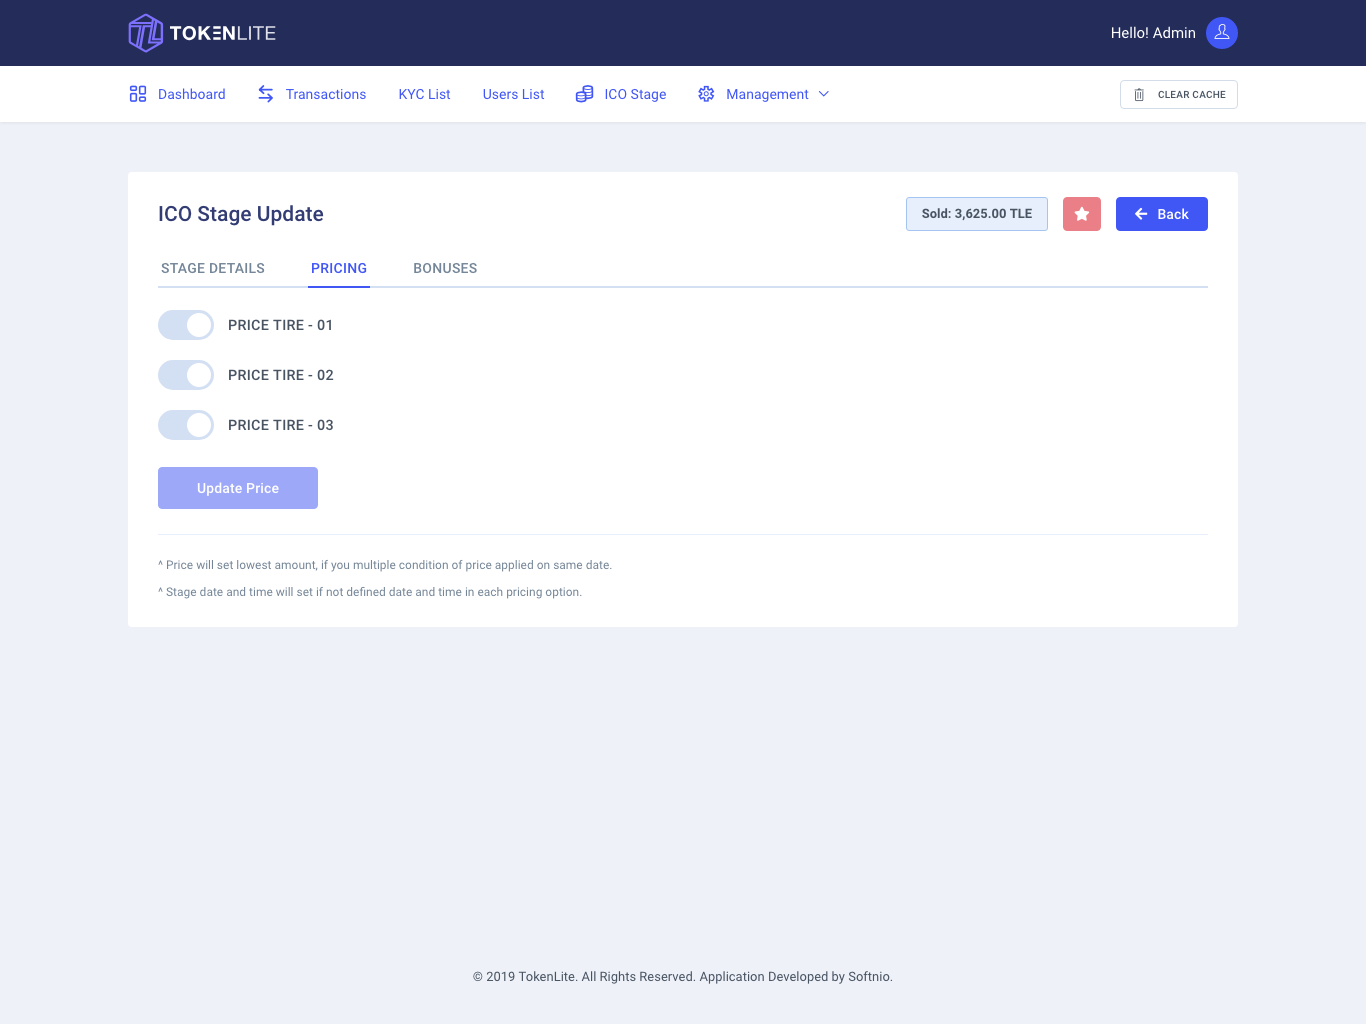
Edit Stage Prices Tire
The Price tire options is look like this.
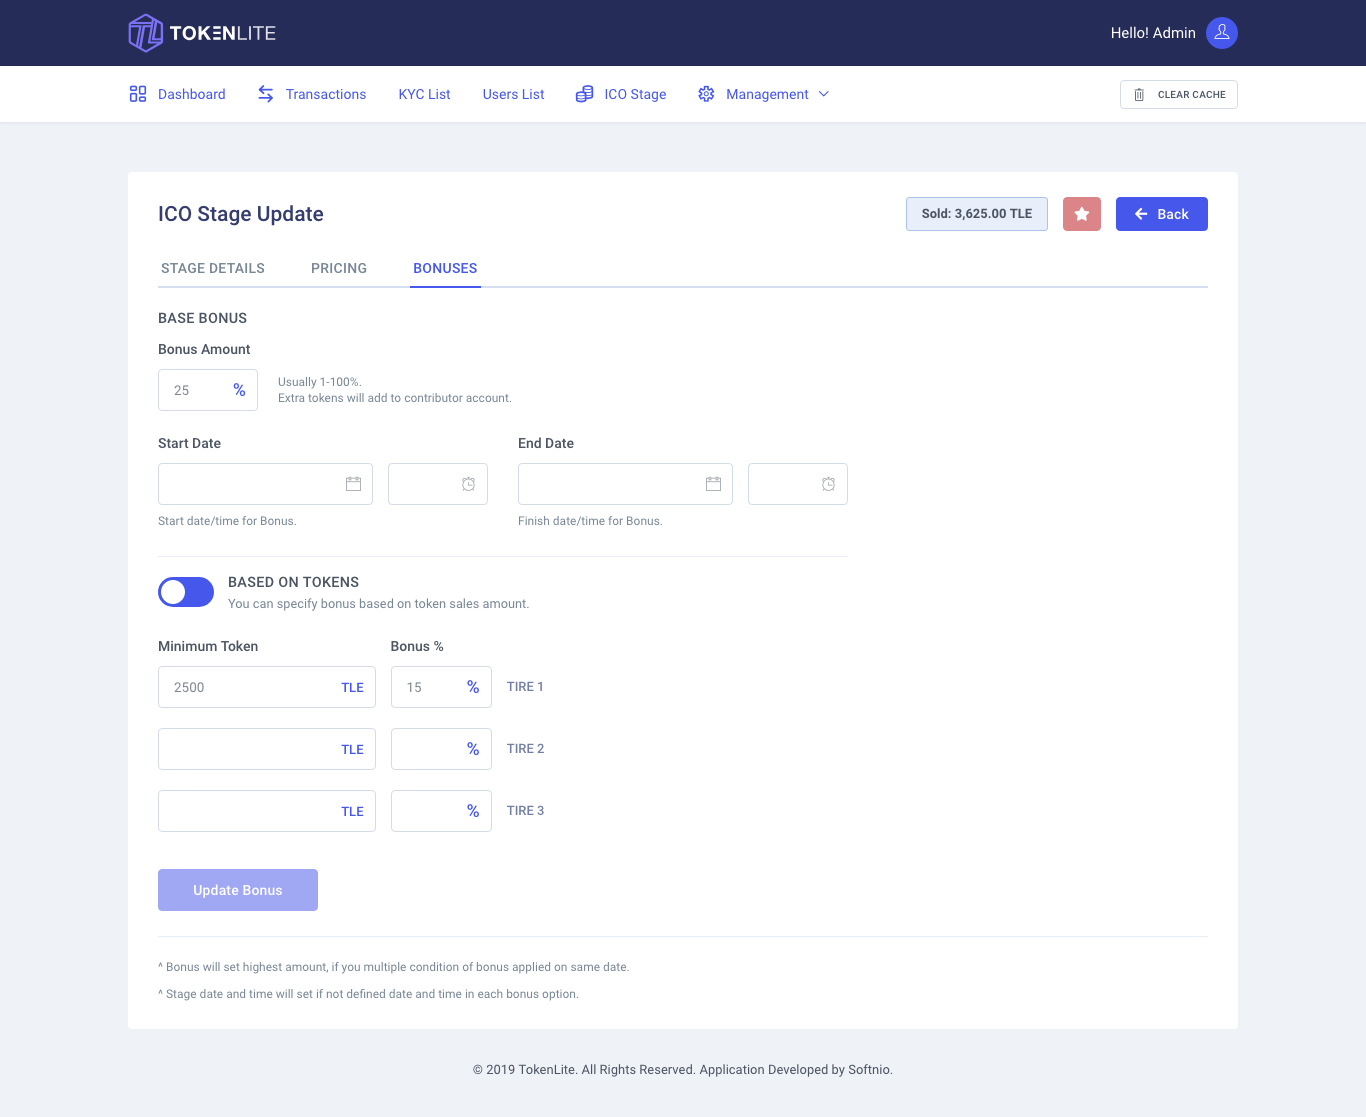
Edit the Bonus Option
Here is two types of bonus available.
First is base bonus, this bonus is always active if you set any amount.
And the Second bonus option is Amount bonus, when user contribute amount is equal or greater then the amount token then user get a bonus percentage of his total tokens.
Everything is done
Your application is ready.
If you have facing any problem then see the Common Troubleshoot page.